
Note: This tutorial is fairly extensive, if you are after something shorter please also see our Getting Started and How To Create a Client Server Application In Minutes tutorials.
Note2: This example is included, and has been significantly extended to demonstrate further features, in the examples bundle included in the package downloads.
Before we get started ensure you have Visual Studio 2010 Express or later installed, which should come with .Net 4 or later.
1. Create Visual Studio Project
- Create a new visual studio solution containing a Visual C# ‘WPF Application‘ project naming it ‘WPFChatExample‘
- Right click on the project just created and select ‘Properties‘. Ensure the ‘Target Framework‘ is ‘.NET Framework 4‘ and not ‘.NET Framework 4 Client Profile‘. You should now have something that looks like this.
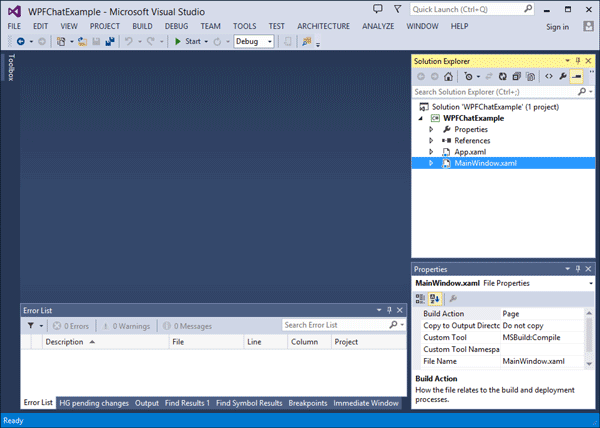
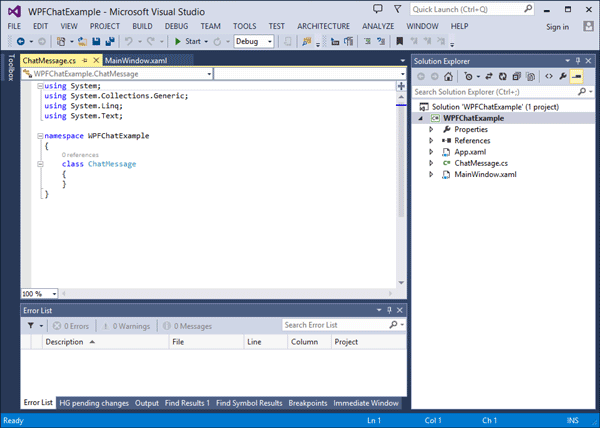
Freshly created visual studio application named ‘WPFChatExample’
2. Add NetworkComms .Net DLL to Project
- The NetworkComms.Net download package contains DLLs for all supported platforms but we are only interested in the Net40 > Release > Complete DLL. Copy this DLL to the same location as the solution we created in step 1.
- We now need to add a project reference to the NetworkComms .Net DLL we just added. Right click on the ‘WPFChatExample‘ project and select ‘Add Reference…‘. Within the window that opens select the Browse tab and select the DLL we just added.
- If you expand the ‘References‘ folder within the project you should now see the NetworkComms .Net reference you just added like this:
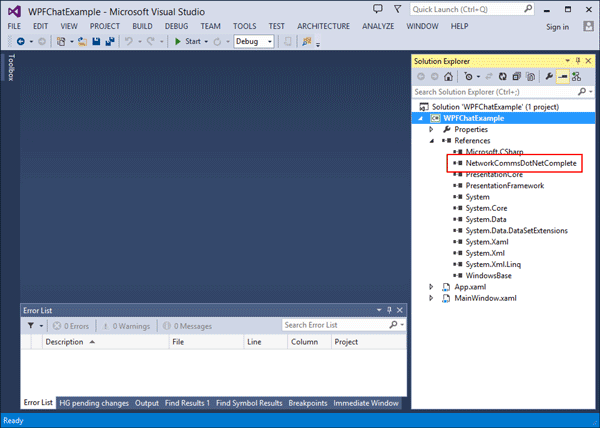
‘WPFChatExample’ WPF application containing a reference to the complete NetworkComms .Net DLL.
3. Add WPF Elements
- We need to add the text boxes and buttons that we intend to interact with to the WPF layout. To get started double click the ‘MainWindow.xaml‘ file so that it opens in the main viewer:
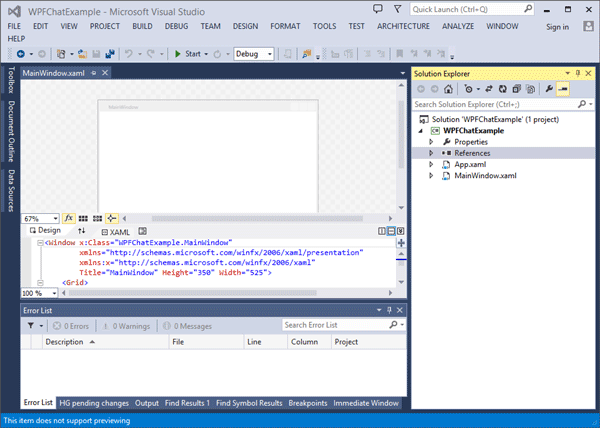
The open ‘MainWindow.xaml’ file showing both ‘Design’ and ‘XAML’.
- If you wanted to you could now add each individual text box and button by hand. To save a little time however we have provided a base layout that you can copy and paste. Copy and paste the following code to replace ALL EXISTING code in the XAML view of ‘MainWindow.xaml‘:
<Window x:Class="WPFChatExample.MainWindow"
        xmlns="http://schemas.microsoft.com/winfx/2006/xaml/presentation"
        xmlns:x="http://schemas.microsoft.com/winfx/2006/xaml"
        Title="NetworkComms .Net WPF Chat Example" Height="341" Width="512" Background="#FF7CA0FF" ResizeMode="CanMinimize">
    <Grid>
        <TextBox Height="23" HorizontalAlignment="Left" Margin="68,8,0,0" Name="serverIP" VerticalAlignment="Top" Width="97" />
        <Label Content="Server IP:" Height="28" HorizontalAlignment="Left" Margin="8,6,0,0" Name="label1" VerticalAlignment="Top" />
        <TextBox Height="23" HorizontalAlignment="Left" Margin="199,8,0,0" Name="serverPort" VerticalAlignment="Top" Width="47" />
        <Label Content="Port:" Height="28" HorizontalAlignment="Left" Margin="166,6,0,0" Name="label2" VerticalAlignment="Top" />
        <TextBox Height="231" HorizontalAlignment="Left" Margin="11,38,0,0" Name="chatBox" VerticalAlignment="Top" Width="356" IsReadOnly="True" VerticalScrollBarVisibility="Visible" />
        <Label Content="Messages from:" Height="28" HorizontalAlignment="Left" Margin="369,84,0,0" Name="label3" VerticalAlignment="Top" Width="98" />
        <TextBox Height="161" HorizontalAlignment="Left" Margin="373,108,0,0" Name="messagesFrom" VerticalAlignment="Top" Width="117" IsReadOnly="True" VerticalScrollBarVisibility="Auto" />
        <Label Content="Local Name:" Height="28" HorizontalAlignment="Left" Margin="293,7,0,0" Name="label4" VerticalAlignment="Top" />
        <TextBox Height="23" HorizontalAlignment="Left" Margin="373,8,0,0" Name="localName" VerticalAlignment="Top" Width="117" />
        <Label Content="Message:" Height="28" HorizontalAlignment="Left" Margin="5,272,0,0" Name="label5" VerticalAlignment="Top" />
        <TextBox Height="23" HorizontalAlignment="Left" Margin="62,274,0,0" Name="messageText" VerticalAlignment="Top" Width="305" />
        <Button Content="Send" Height="23" HorizontalAlignment="Left" Margin="373,274,0,0" Name="sendMessageButton" VerticalAlignment="Top" Width="117"/>
        <CheckBox Content="Enable Server" Height="16" HorizontalAlignment="Left" Margin="377,44,0,0" x:Name="enableServer" VerticalAlignment="Top"/>
        <CheckBox Content="Use Encryption" Height="16" HorizontalAlignment="Left" Margin="377,65,0,0" Name="useEncryptionBox" VerticalAlignment="Top"/>
    </Grid>
</Window>
- The design window should now show the equivalent of the XAML you have just pasted from above. This gives us the very basic layout of the chat application:
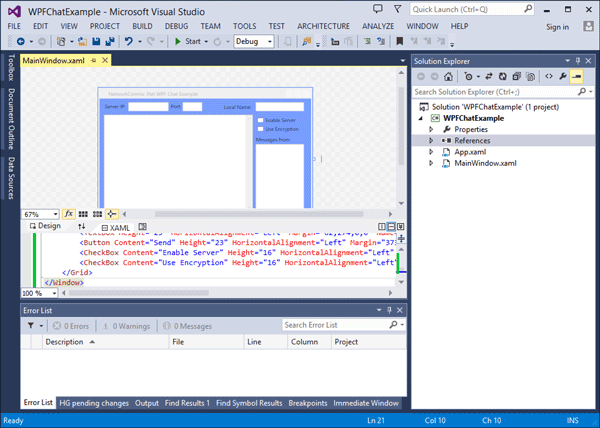
After Copy and Paste of the example xaml code the design window should now show the basic layout.
- Press ‘F5’ on your keyboard to ensure that the project builds successfully (i.e. the Errors List window in Visual studio remains empty). If the project does not build at this point please go back over this tutorial and make sure you have completed all of the necessary steps. If the project does build you should now see the WPF application, although of course, we still need to add all of the functionality.

The WPF chat application example. All of the layout elements have been added but lack any functionality.
4. Add ChatMessage Wrapper Class
- The next step is to create a wrapper class for the messages we will be sending and receiving, i.e. a single object we send and receive that contains all necessary information. Right click on the project and select ‘Add‘ > ‘New Item…‘. This should bring up the ‘Add New Item‘ window, a list of options that you can add to the project. Ensure that ‘Class‘ item is selected, and at the bottom of the window enter the name ‘ChatMessage.cs‘. Now click ‘Add‘. The new class file should open automatically and you should now have something like this:
The new class, named ‘ChatMessage.cs’. This will be used as the wrapper for the chat messages.
- Copy and paste the following code, replacing ALL EXISTING code in the class we just created, ‘ChatMessage.cs‘:
using System;
using System.Collections.Generic;
using System.Linq;
using System.Text;

//We need to include the following three namespaces to this class
using NetworkCommsDotNet;
using NetworkCommsDotNet.Tools;
using ProtoBuf;

namespace WPFChatExample
{
    /// <summary>
    /// A wrapper class for the messages that we intend to send and receive.
    /// The [ProtoContract] attribute informs NetworkComms .Net that we intend to
    /// serialise (turn into bytes) this object. At the base level the
    /// serialisation is performed by protobuf.net.
    /// </summary>
    [ProtoContract]
    class ChatMessage
    {
        /// <summary>
        /// The source identifier of this ChatMessage.
        /// We use this variable as the constructor for the ShortGuid.
        /// The [ProtoMember(1)] attribute informs the serialiser that when
        /// an object of type ChatMessage is serialised we want to include this variable
        /// </summary>
        [ProtoMember(1)]
        string _sourceIdentifier;

        /// <summary>
        /// The source identifier is accessible as a ShortGuid
        /// </summary>
        public ShortGuid SourceIdentifier { get { return new ShortGuid(_sourceIdentifier); } }

        /// <summary>
        /// The name of the source of this ChatMessage.
        /// We use shorthand declaration, get and set.
        /// The [ProtoMember(2)] attribute informs the serialiser that when
        /// an object of type ChatMessage is serialised we want to include this variable
        /// </summary>
        [ProtoMember(2)]
        public string SourceName { get; private set; }

        /// <summary>
        /// The actual message.
        /// </summary>
        [ProtoMember(3)]
        public string Message { get; private set; }

        /// <summary>
        /// The index of this message. Every message sent by a particular source
        /// has an incrementing index.
        /// </summary>
        [ProtoMember(4)]
        public long MessageIndex { get; private set; }

        /// <summary>
        /// The number of times this message has been relayed.
        /// </summary>
        [ProtoMember(5)]
        public int RelayCount { get; private set; }

        /// <summary>
        /// We must include a private constructor to be used by the deserialisation step.
        /// </summary>
        private ChatMessage() { }

        /// <summary>
        /// Create a new ChatMessage
        /// </summary>
        /// <param name="sourceIdentifier">The source identifier</param>
        /// <param name="sourceName">The source name</param>
        /// <param name="message">The message to be sent</param>
        /// <param name="messageIndex">The index of this message</param>
        public ChatMessage(ShortGuid sourceIdentifier, string sourceName, string message, long messageIndex)
        {
            this._sourceIdentifier = sourceIdentifier;
            this.SourceName = sourceName;
            this.Message = message;
            this.MessageIndex = messageIndex;
            this.RelayCount = 0;
        }

        /// <summary>
        /// Increment the relay count variable
        /// </summary>
        public void IncrementRelayCount()
        {
            RelayCount++;
        }
    }
}
5. Adding Functionality To Code Element of MainWindow.xaml
- We now turn our attention to the code element of ‘MainWindow.xaml‘. To access the code element right click on ‘MainWindow.xaml‘ and select ‘View Code‘ from the context menu. You should see a code file that contains something like follows, all of the code we are subsequently going to add will be within the ‘MainWindow‘ class:
using System;
using System.Collections.Generic;
using System.Linq;
using System.Text;
using System.Windows;
using System.Windows.Controls;
using System.Windows.Data;
using System.Windows.Documents;
using System.Windows.Input;
using System.Windows.Media;
using System.Windows.Media.Imaging;
using System.Windows.Navigation;
using System.Windows.Shapes;

namespace WPFChatExample
{
    /// <summary>
    /// Interaction logic for MainWindow.xaml
    /// </summary>
    public partial class MainWindow : Window
    {
        public MainWindow()
        {
            InitializeComponent();
        }
    }
}
- Since we are going to be performing network tasks within this class we need to add the relevant namespace references first. Underneath all of the ‘using System…‘ namespaces references you want to add:
//We need to include the following namespaces
using System.Net;
using NetworkCommsDotNet;
using NetworkCommsDotNet.DPSBase;
using NetworkCommsDotNet.Tools;
using NetworkCommsDotNet.Connections;
using NetworkCommsDotNet.Connections.TCP;
- Next we are going to add some class variables to help us keep track of the current application state. We want to keep track of:
- The most recent messages we have received.
- The maximum number of times we will relay a message.
- An optional encryption key.
- A local index we will use when sending new messages.
- To track these items add the following code at the start of the class:
#region Private Fields
/// <summary>
/// Dictionary to keep track of which peer messages have already been written to the chat window
/// </summary>
Dictionary<ShortGuid, ChatMessage> lastPeerMessageDict = new Dictionary<ShortGuid, ChatMessage>();

/// <summary>
/// The maximum number of times a chat message will be relayed
/// </summary>
int relayMaximum = 3;

/// <summary>
/// An optional encryption key to use should one be required.
/// This can be changed freely but must obviously be the same
/// for both sender and receiver.
/// </summary>
string encryptionKey = "ljlhjf8uyfln23490jf;m21-=scm20--iflmk;";

/// <summary>
/// A local counter used to track the number of messages sent from
/// this instance.
/// </summary>
long messageSendIndex = 0;
#endregion
- Next we add the methods which will be used by the WPF GUI. The first two methods can be used to update the Chat and MessageFrom text boxes from any thread:
/// <summary>
/// Append the provided message to the chatBox text box.
/// </summary>
/// <param name="message"></param>
private void AppendLineToChatBox(string message)
{
    //To ensure we can successfully append to the text box from any thread
    //we need to wrap the append within an invoke action.
    chatBox.Dispatcher.BeginInvoke(new Action<string>((messageToAdd) =>
    {
        chatBox.AppendText(messageToAdd + "\n");
        chatBox.ScrollToEnd();
    }), new object[] { message });
}

/// <summary>
/// Refresh the messagesFrom text box using the recent message history.
/// </summary>
private void RefreshMessagesFromBox()
{
    //We will perform a lock here to ensure the text box is only
    //updated one thread at  time
    lock (lastPeerMessageDict)
    {
        //Use a linq expression to extract an array of all current users from lastPeerMessageDict
        string[] currentUsers = (from current in lastPeerMessageDict.Values orderby current.SourceName select current.SourceName).ToArray();

        //To ensure we can successfully append to the text box from any thread
        //we need to wrap the append within an invoke action.
        this.messagesFrom.Dispatcher.BeginInvoke(new Action<string[]>((users) =>
        {
            //First clear the text box
            messagesFrom.Text = "";

            //Now write out each username
            foreach (var username in users)
                messagesFrom.AppendText(username + "\n");
        }), new object[] { currentUsers });
    }
}
- What follows next are five methods that will be attached to elements on the WPF layout in Step 6. They will be used to send our messages, toggle encryption, toggle local server mode and correctly shut everything down when we are finished with the application:
/// <summary>
/// Send any entered message when we click the send button.
/// </summary>
/// <param name="sender"></param>
/// <param name="e"></param>
private void SendMessageButton_Click(object sender, RoutedEventArgs e)
{
    SendMessage();
}

/// <summary>
/// Send any entered message when we press enter or return
/// </summary>
/// <param name="sender"></param>
/// <param name="e"></param>
private void MessageText_KeyUp(object sender, KeyEventArgs e)
{
    if (e.Key == Key.Enter || e.Key == Key.Return)
        SendMessage();
}

/// <summary>
/// Toggle encryption
/// </summary>
/// <param name="sender"></param>
/// <param name="e"></param>
private void UseEncryptionBox_CheckedToggle(object sender, RoutedEventArgs e)
{
    if (useEncryptionBox.IsChecked != null && (bool)useEncryptionBox.IsChecked)
    {
        RijndaelPSKEncrypter.AddPasswordToOptions(NetworkComms.DefaultSendReceiveOptions.Options, encryptionKey);
        NetworkComms.DefaultSendReceiveOptions.DataProcessors.Add(DPSManager.GetDataProcessor<RijndaelPSKEncrypter>());
    }
    else
        NetworkComms.DefaultSendReceiveOptions.DataProcessors.Remove(DPSManager.GetDataProcessor<RijndaelPSKEncrypter>());
}

/// <summary>
/// Correctly shutdown NetworkComms .Net when closing the WPF application
/// </summary>
/// <param name="sender"></param>
/// <param name="e"></param>
private void Window_Closing(object sender, System.ComponentModel.CancelEventArgs e)
{
    //Ensure we shutdown comms when we are finished
    NetworkComms.Shutdown();
}

/// <summary>
/// Toggle whether the local application is acting as a server
/// </summary>
/// <param name="sender"></param>
/// <param name="e"></param>
private void EnableServer_Toggle(object sender, RoutedEventArgs e)
{
    //Enable or disable the local server mode depending on the checkbox IsChecked value
    if (enableServer.IsChecked != null && (bool)enableServer.IsChecked)
        ToggleServerMode(true);
    else
        ToggleServerMode(false);
}
- Next we add the method that can be used to toggle the local server mode of the application:
/// <summary>
/// Wrap the functionality required to enable/disable the local application server mode
/// </summary>
/// <param name="enableServer"></param>
private void ToggleServerMode(bool enableServer)
{
    if (enableServer)
    {
        //Start listening for new incoming TCP connections
        //Parameters ensure we listen across all adaptors using a random port
        Connection.StartListening(ConnectionType.TCP, new IPEndPoint(IPAddress.Any, 0));

        //Write the IP addresses and ports that we are listening on to the chatBox
        chatBox.AppendText("Listening for incoming TCP connections on:\n");
        foreach (IPEndPoint listenEndPoint in Connection.ExistingLocalListenEndPoints(ConnectionType.TCP))
            chatBox.AppendText(listenEndPoint.Address + ":" + listenEndPoint.Port + "\n");
    }
    else
    {
        NetworkComms.Shutdown();
        chatBox.AppendText("Server disabled. No longer accepting connections and all existing connections have been closed.");
    }
}
- Next we will create a method that can be executed by NetworkComms .Net when a chat message has been received. We could put whatever we wanted in this method but since we are making a chat application we probably want the method to:
- Print the message to the ChatBox text box.
- Update the Messages From text box.
- Relay the message to other peers.
- The method that can perform these functions is as follows:
/// <summary>
/// Performs whatever functions we might so desire when we receive an incoming ChatMessage
/// </summary>
/// <param name="header">The PacketHeader corresponding with the received object</param>
/// <param name="connection">The Connection from which this object was received</param>
/// <param name="incomingMessage">The incoming ChatMessage we are after</param>
private void HandleIncomingChatMessage(PacketHeader header, Connection connection, ChatMessage incomingMessage)
{
    //We only want to write a message once to the chat window
    //Because we allow relaying and may receive the same message twice
    //we use our history and message indexes to ensure we have a new message
    lock (lastPeerMessageDict)
    {
        if (lastPeerMessageDict.ContainsKey(incomingMessage.SourceIdentifier))
        {
            if (lastPeerMessageDict[incomingMessage.SourceIdentifier].MessageIndex < incomingMessage.MessageIndex)
            {
                //If this message index is greater than the last seen from this source we can safely
                //write the message to the ChatBox
                AppendLineToChatBox(incomingMessage.SourceName + " - " + incomingMessage.Message);

                //We now replace the last received message with the current one
                lastPeerMessageDict[incomingMessage.SourceIdentifier] = incomingMessage;
            }
        }
        else
        {
            //If we have never had a message from this source before then it has to be new
            //by definition
            lastPeerMessageDict.Add(incomingMessage.SourceIdentifier, incomingMessage);
            AppendLineToChatBox(incomingMessage.SourceName + " - " + incomingMessage.Message);
        }
    }

    //Once we have written to the ChatBox we refresh the MessagesFromWindow
    RefreshMessagesFromBox();

    //This last section of the method is the relay function
    //We start by checking to see if this message has already been relayed
    //the maximum number of times
    if (incomingMessage.RelayCount < relayMaximum)
    {
        //If we are going to relay this message we need an array of
        //all other known connections
        var allRelayConnections = (from current in NetworkComms.GetExistingConnection() where current != connection select current).ToArray();

        //We increment the relay count before we send
        incomingMessage.IncrementRelayCount();

        //We will now send the message to every other connection
        foreach (var relayConnection in allRelayConnections)
        {
            //We ensure we perform the send within a try catch
            //To ensure a single failed send will not prevent the
            //relay to all working connections.
            try { relayConnection.SendObject("ChatMessage", incomingMessage); }
            catch (CommsException) { /* Catch the comms exception, ignore and continue */ }
        }
    }
}
- NetworkComms .Net has a vast range of features and usage cases. One of those allows you to execute code every time a connection is disconnected. For this example we will create a method that writes a disconnection message to the ChatBox. The method is as follows:
/// <summary>
/// Performs whatever functions we might so desire when an existing connection is closed.
/// </summary>
/// <param name="connection">The closed connection</param>
private void HandleConnectionClosed(Connection connection)
{
    //We are going to write a message to the ChatBox when a user disconnects
    //We perform the following within a lock so that threads proceed one at a time
    lock (lastPeerMessageDict)
    {
        //Extract the remoteIdentifier from the closed connection
        ShortGuid remoteIdentifier = connection.ConnectionInfo.NetworkIdentifier;

        //If at some point we received a message with this identifier we can
        //include the source name in the disconnection message.
        if (lastPeerMessageDict.ContainsKey(remoteIdentifier))
            AppendLineToChatBox("Connection with '" + lastPeerMessageDict[remoteIdentifier].SourceName + "' has been closed.");
        else
            AppendLineToChatBox("Connection with '" + connection.ToString() + "' has been closed.");

        //Last thing is to remove this entry from our message history
        lastPeerMessageDict.Remove(connection.ConnectionInfo.NetworkIdentifier);
    }

    //Refresh the messages from box to reflect this disconnection
    RefreshMessagesFromBox();
}
- The next method will be used to send any message that we create:
/// <summary>
/// Send our message.
/// </summary>
private void SendMessage()
{
    //If we have tried to send a zero length string we just return
    if (messageText.Text.Trim() == "") return;

    //We may or may not have entered some server connection information
    ConnectionInfo serverConnectionInfo = null;
    if (serverIP.Text != "")
    {
        try { serverConnectionInfo = new ConnectionInfo(serverIP.Text.Trim(), int.Parse(serverPort.Text)); }
        catch (Exception)
        {
            MessageBox.Show("Failed to parse the server IP and port. Please ensure it is correct and try again", "Server IP & Port Parse Error", MessageBoxButton.OK);
            return;
        }
    }

    //We wrap everything we want to send in the ChatMessage class we created
    ChatMessage messageToSend = new ChatMessage(NetworkComms.NetworkIdentifier, localName.Text, messageText.Text, messageSendIndex++);

    //We add our own message to the message history in-case it gets relayed back to us
    lock (lastPeerMessageDict) lastPeerMessageDict[NetworkComms.NetworkIdentifier] = messageToSend;

    //We write our own message to the chatBox
    AppendLineToChatBox(messageToSend.SourceName + " - " + messageToSend.Message);

    //We refresh the MessagesFrom box so that it includes our own name
    RefreshMessagesFromBox();

    //We clear the text within the messageText box.
    this.messageText.Text = "";

    //If we provided server information we send to the server first
    if (serverConnectionInfo != null)
    {
        //We perform the send within a try catch to ensure the application continues to run if there is a problem.
        try { TCPConnection.GetConnection(serverConnectionInfo).SendObject("ChatMessage", messageToSend); }
        catch (CommsException) { MessageBox.Show("A CommsException occurred while trying to send message to " + serverConnectionInfo, "CommsException", MessageBoxButton.OK); }
    }

    //If we have any other connections we now send the message to those as well
    //This ensures that if we are the server everyone who is connected to us gets our message
    var otherConnectionInfos = (from current in NetworkComms.AllConnectionInfo() where current != serverConnectionInfo select current).ToArray();
    foreach (ConnectionInfo info in otherConnectionInfos)
    {
        //We perform the send within a try catch to ensure the application continues to run if there is a problem.
        try { TCPConnection.GetConnection(info).SendObject("ChatMessage", messageToSend); }
        catch (CommsException) { MessageBox.Show("A CommsException occurred while trying to send message to " + info, "CommsException", MessageBoxButton.OK); }
    }
}
- The last thing we need to add within the Code Element of ‘MainWindow.xaml‘ is the correct initialisation of NetworkComms .Net. In order to correctly initialise NetworkComms .Net we need to:
- Set the default Local Name to our machines hostname.
- Trigger the method ‘HandleIncomingMessage‘ when we receive a packet of type ‘ChatMessage‘.
- Trigger the method ‘HandleConnectionClosed‘ when an existing connection is closed.
- We perform these initialisation tasks in the MainWindow class constructor by replacing it with the following code:
public MainWindow()
{
    InitializeComponent();

    //Write the IP addresses and ports that we are listening on to the chatBox
    chatBox.AppendText("Initialised WPF chat example.");

    //Add a blank line after the initialisation output
    chatBox.AppendText("\n");

    //Set the default Local Name box using to the local host name
    localName.Text = HostInfo.HostName;

    //Configure NetworkComms .Net to handle and incoming packet of type 'ChatMessage'
    //e.g. If we receive a packet of type 'ChatMessage' execute the method 'HandleIncomingChatMessage'
    NetworkComms.AppendGlobalIncomingPacketHandler<ChatMessage>("ChatMessage", HandleIncomingChatMessage);

    //Configure NetworkComms .Net to perform an action when a connection is closed
    //e.g. When a connection is closed execute the method 'HandleConnectionClosed'
    NetworkComms.AppendGlobalConnectionCloseHandler(HandleConnectionClosed);
}
6. Add Events To WPF Layout
- The final step in the application is to add the necessary events so that the buttons and text boxes in the layout can be used to send messages. This is done by editing the XAML of the MainWindow. This is the same XAML edited in step 3 of this tutorial, but to recap, access the XAML by double clicking ‘MainWindow.xaml‘ in the Solution Explorer window.
- When the application closes we want to run the method Window_Closing. Replace the top section of the XAML which currently looks like this:
<Window x:Class="WPFChatExample.MainWindow"
        xmlns="http://schemas.microsoft.com/winfx/2006/xaml/presentation"
        xmlns:x="http://schemas.microsoft.com/winfx/2006/xaml"
        Title="NetworkComms .Net WPF Chat Example" Height="341" Width="512" Background="#FF7CA0FF" ResizeMode="CanMinimize">
with this (note the addition of Closing=”Window_Closing” at the end):
<Window x:Class="WPFChatExample.MainWindow"
        xmlns="http://schemas.microsoft.com/winfx/2006/xaml/presentation"
        xmlns:x="http://schemas.microsoft.com/winfx/2006/xaml"
        Title="NetworkComms .Net WPF Chat Example" Height="341" Width="512" Background="#FF7CA0FF" ResizeMode="CanMinimize" Closing="Window_Closing">
- We want a message to be sent when we click the ‘Send‘ button. We do this by replacing the line:
<Button Content="Send" Height="23" HorizontalAlignment="Left" Margin="373,274,0,0" Name="sendMessageButton" VerticalAlignment="Top" Width="117" />
with
<Button Content="Send" Height="23" HorizontalAlignment="Left" Margin="373,274,0,0" Name="sendMessageButton" VerticalAlignment="Top" Width="117" Click="SendMessageButton_Click"/>
- We want the user to be able to press Enter or Return to send a message after typing something in the message box. We do this by replacing the line:
<TextBox Height="23" HorizontalAlignment="Left" Margin="62,274,0,0" Name="messageText" VerticalAlignment="Top" Width="305" />
with
<TextBox Height="23" HorizontalAlignment="Left" Margin="62,274,0,0" Name="messageText" VerticalAlignment="Top" Width="305" KeyUp="MessageText_KeyUp"/>
- Next we need to add the event for checking and unchecking the ‘Enable Server’ tick box. We do this by replacing the line:
<CheckBox Content="Enable Server" Height="16" HorizontalAlignment="Left" Margin="377,44,0,0" x:Name="enableServer" VerticalAlignment="Top" />
with
<CheckBox Content="Enable Server" Height="16" HorizontalAlignment="Left" Margin="377,44,0,0" x:Name="enableServer" VerticalAlignment="Top" Checked="EnableServer_Toggle" Unchecked="EnableServer_Toggle" />
- Finally we need to add the events for checking and unchecking the ‘Use Encryption‘ tick box. We do this by replacing the line:
<CheckBox Content="Use Encryption" Height="16" HorizontalAlignment="Left" Margin="377,65,0,0" Name="useEncryptionBox" VerticalAlignment="Top" />
with
<CheckBox Content="Use Encryption" Height="16" HorizontalAlignment="Left" Margin="377,65,0,0" Name="useEncryptionBox" VerticalAlignment="Top" Checked="UseEncryptionBox_CheckedToggle" Unchecked="UseEncryptionBox_CheckedToggle" />
- That’s it. We are now ready to see our hard work in action.
7. Test Your WPF Chat Application
- We’ve finally arrived at the testing phase. We now want to open at least two instances of the WPF Chat Application. To do that we first need to build the project in debug mode (make sure Visual Studio shows ‘Debug‘ in the top menu), either by right clicking on the solution and selecting ‘Build Solution‘ or pressing ‘F6‘ on the keyboard.
- Now browse to the build location of the application. One way is to right click on the project in Visual Studio and select ‘Open Folder in Windows Explorer‘. Look for a folder called ‘bin‘ and within that ‘Debug‘.
- You should now see an executable named ‘WPFChatExample.exe‘, double click on this twice to open two instances of the example. Note: When you open the applications you may get a notification from your system firewall. It is important to provide the necessary permissions (see firewall documentation) otherwise the examples will not be able to communicate.
- Choose which one of the applications will act as a server (designated application A). Check the ‘Enable Server‘ tickbox. That application should now show which IPAddresses and ports are available for connecting:
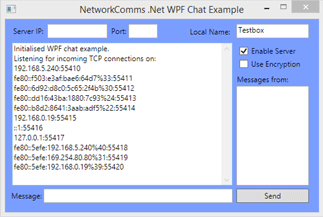
Example output of the completed application after the local server has been enabled.
- Choose an appropriate server IP address and port (generally 127.0.0.1 or 192.168.*.*) from the output shown in application A and enter this information into the other application (application B).
- Now enter a message into application B and click send or press enter. The message will now appear on both applications. Once the connection has been established in this fashion a message can now be entered in either application and it will appear on the other.
- What we have just demonstrated is the most basic connection scenario as follows, here application B selects application A as its server:
-

The most basic connection configuration. Application B has selected application A as its server.
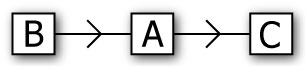
- We could add another application, labelled C and also specify the server as application A as follows:
-
Another basic connection configuration. Application B has selected application A as its server. Application C has also selected application A as its server.
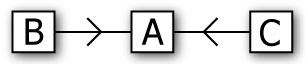
- We could get a little bit more funky because of the relay functionality we added. Instead of application C specifying application A as its server we could set application C to be the server of application A. Once the applications are connected in this fashion entering a message on client C will be relayed via A to B:
-
A more advanced connection configuration. Application B has selected application A as its server. Application A has selected application C as its server.
- The last example configuration with three applications is to set them up as a ring. Application B uses application C as its server, application C uses application A as its server and application A uses application B as its server. This configuration works because we have a maximum number of relays per message and use the message history to prevent duplications being written to the chat window:
-
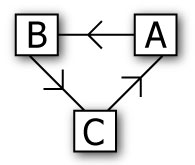
The most advanced connection configuration using three clients. Application A has selected application B as its server. Application B has selected application C as its server. Application C has selected application A as its server.
If Everything Worked 🙂
- If you found this article useful or have any ideas as to how we could improve it please leave us a comment below.
If You Have Problems
- Ensure you have correctly configured your firewall to allow the necessary traffic.
- If you are still have issues please post on our forums and we will be more than happy to help.
For More Information
- See our Getting Started or Basic Client Server Application articles.
- See our online API Reference which explains what all of the methods do.
- Ask any questions on our forums.